Dahua
How to Set up Dahua CCTV system
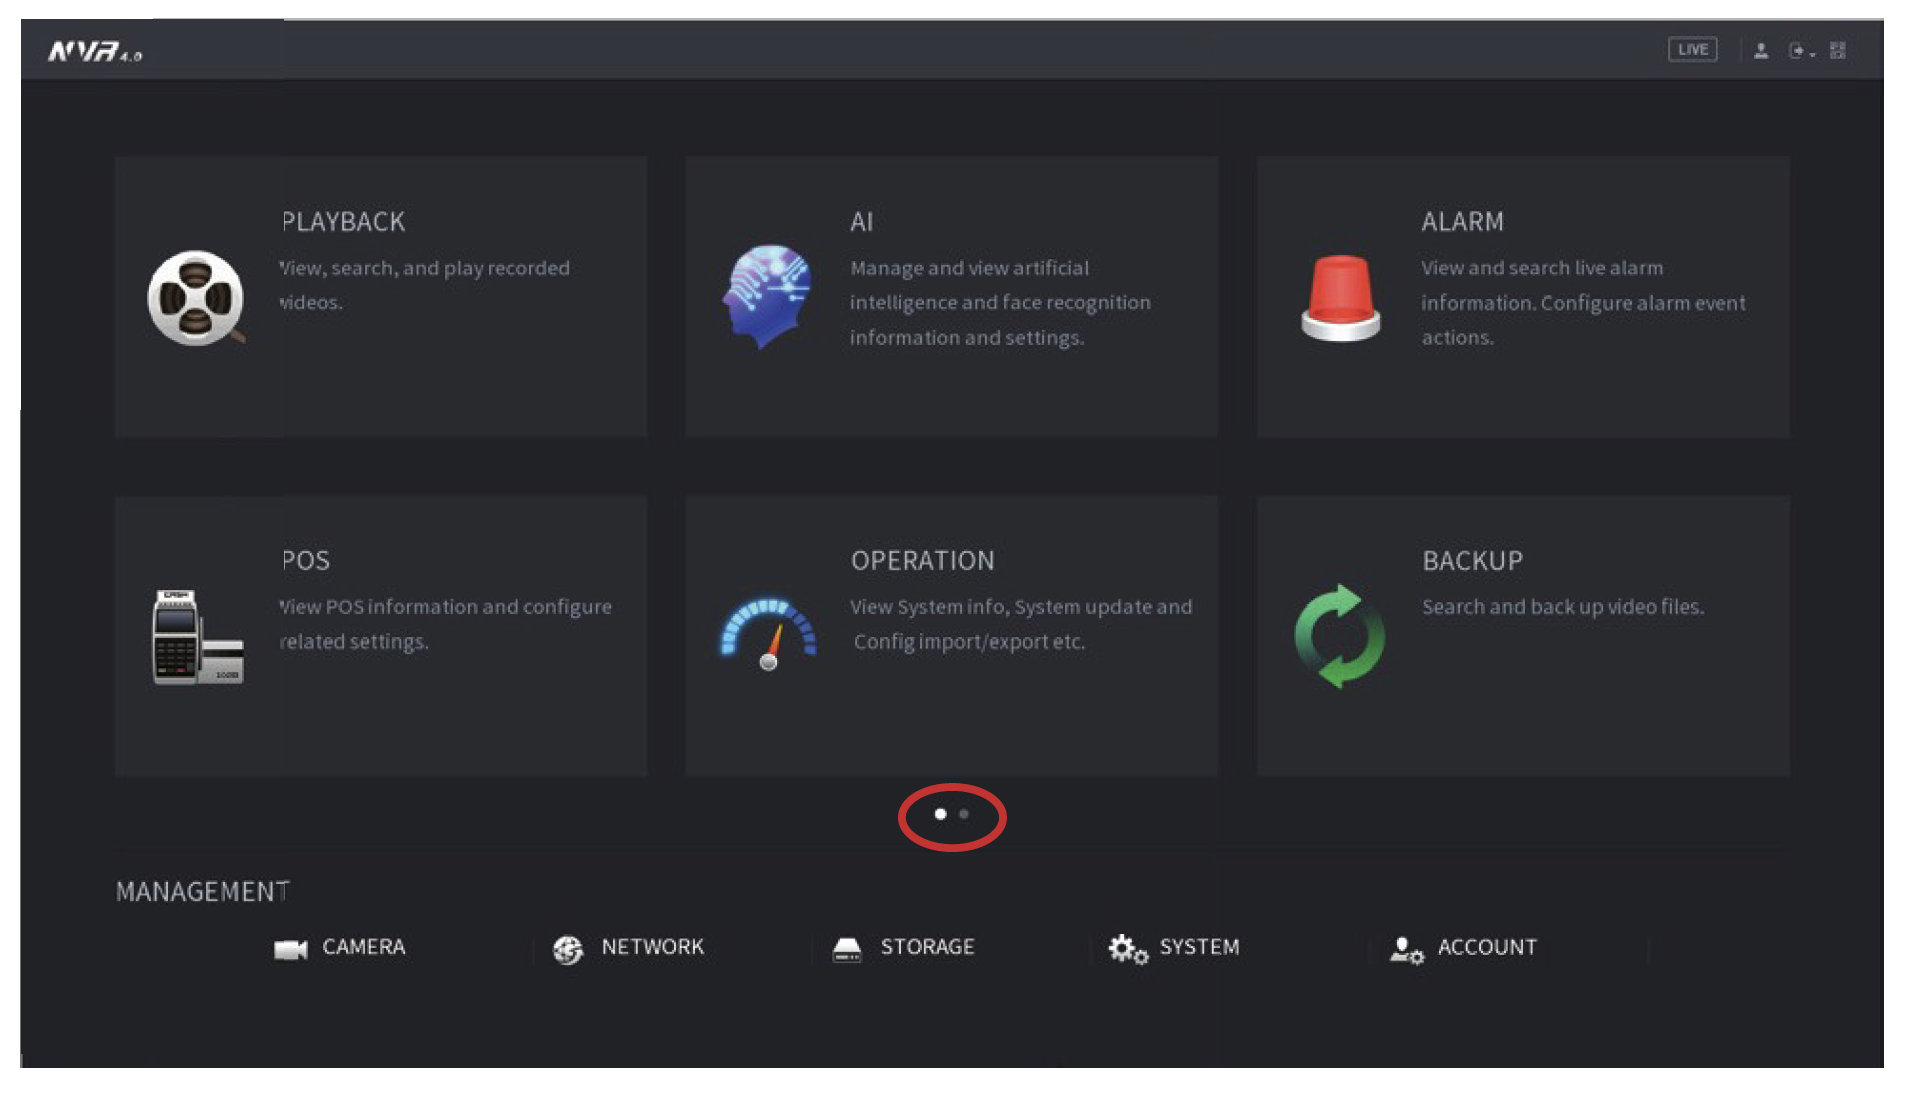
How to navigate the Dahua CCTV interface
Page 1
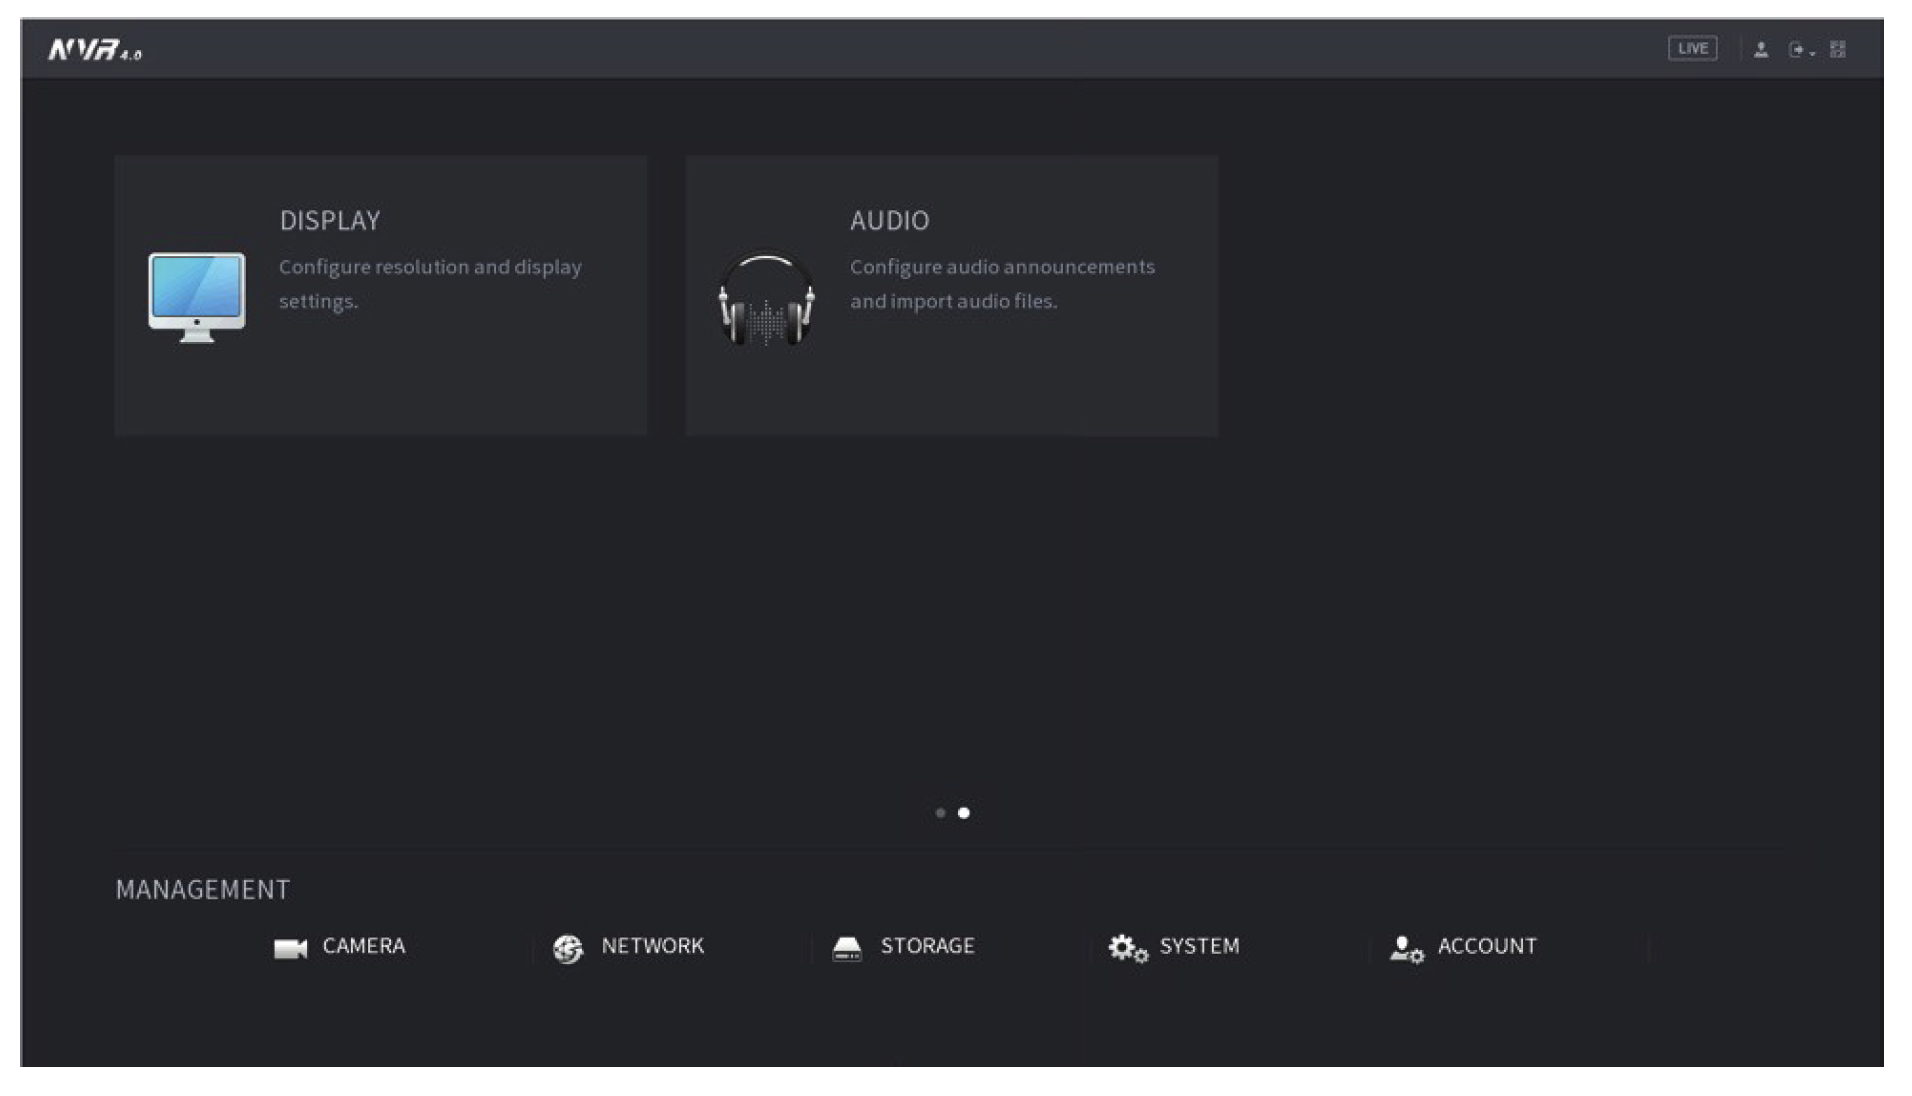
Page 2
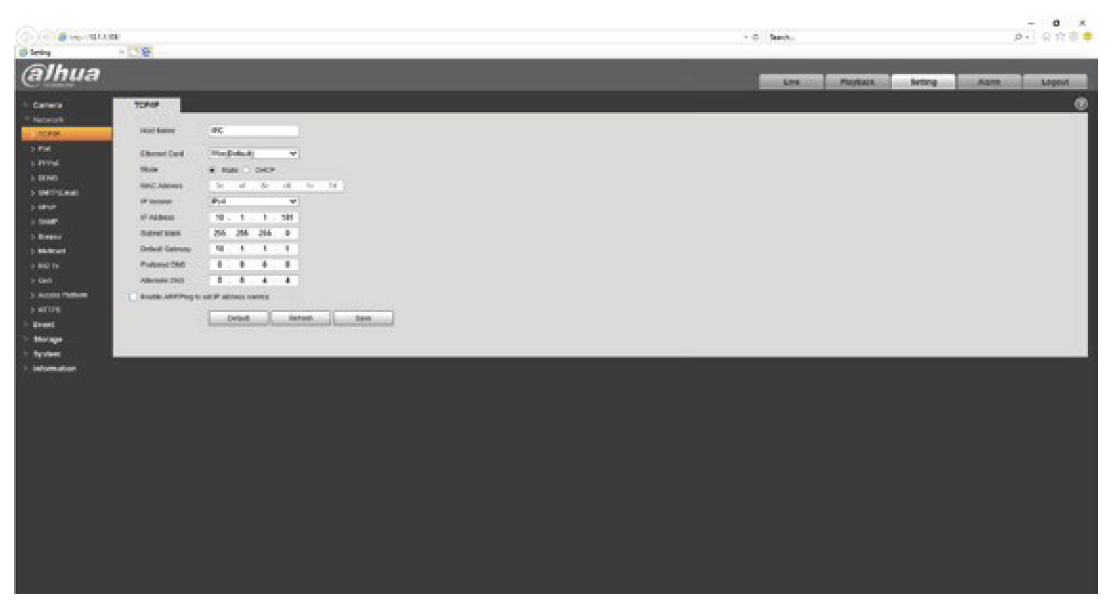
Once logged into the camera browser, go to Setting > Network > TCP/IP and Uncheck the ARP/Ping option.
How to add cameras to a Dahua CCTV system
To add cameras to the NVR manually, right click on the NVR live display to bring up the mouse menu. From here select Camera Registration.
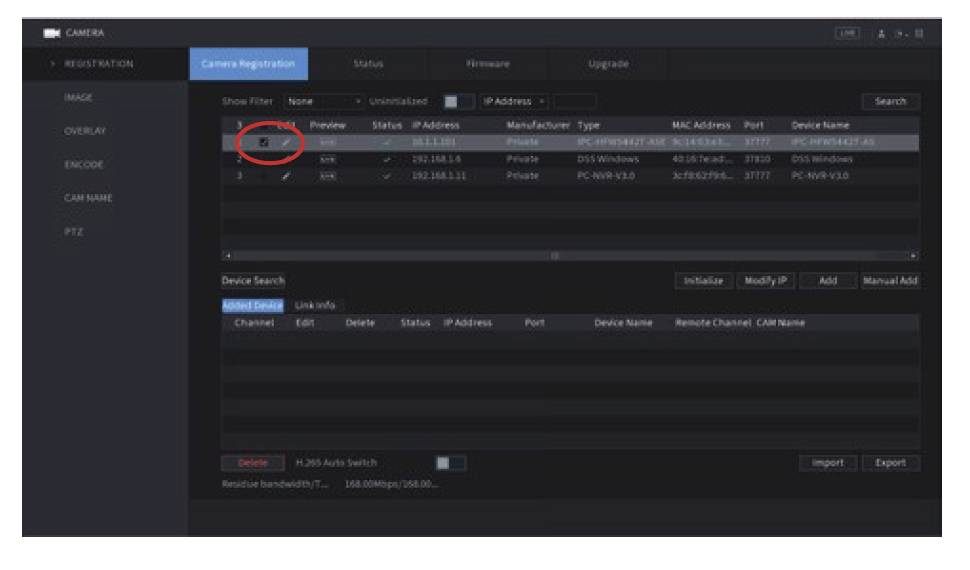
Click Device Search to perform a search for the IP camera
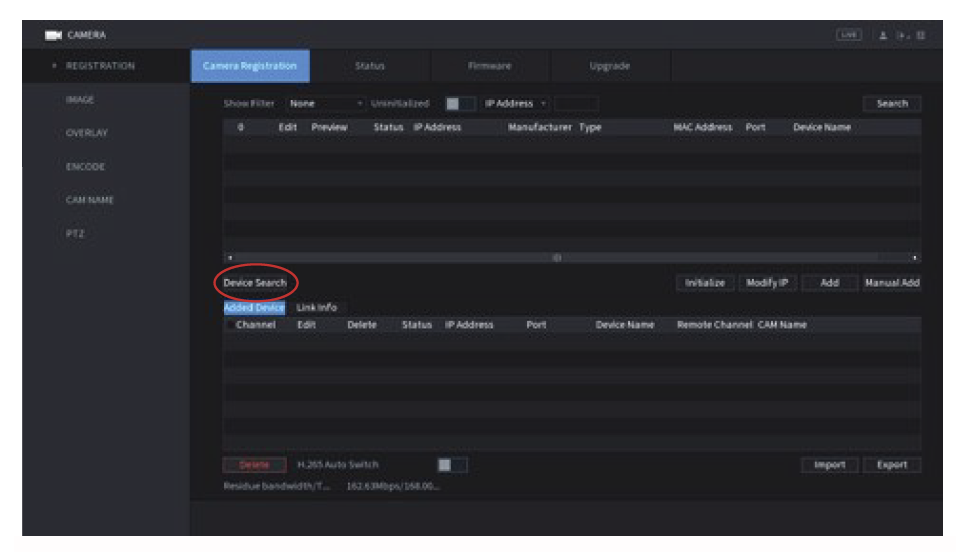
The camera should appear in the top device list. Place a check in the selection box and click add
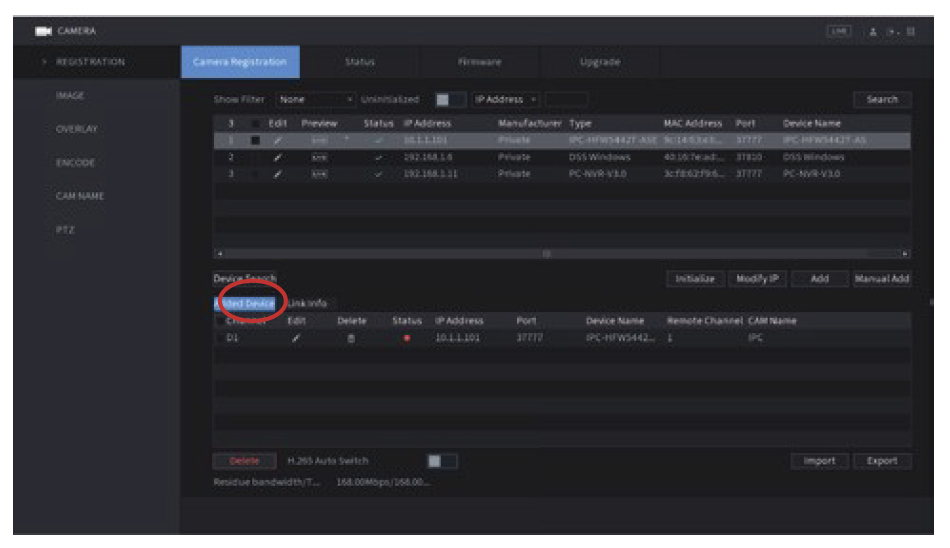
After clicking add the camera should appear in the bottom list. Click the modify icon to bring up the connection settings. Change the password to the password of the camera and click save
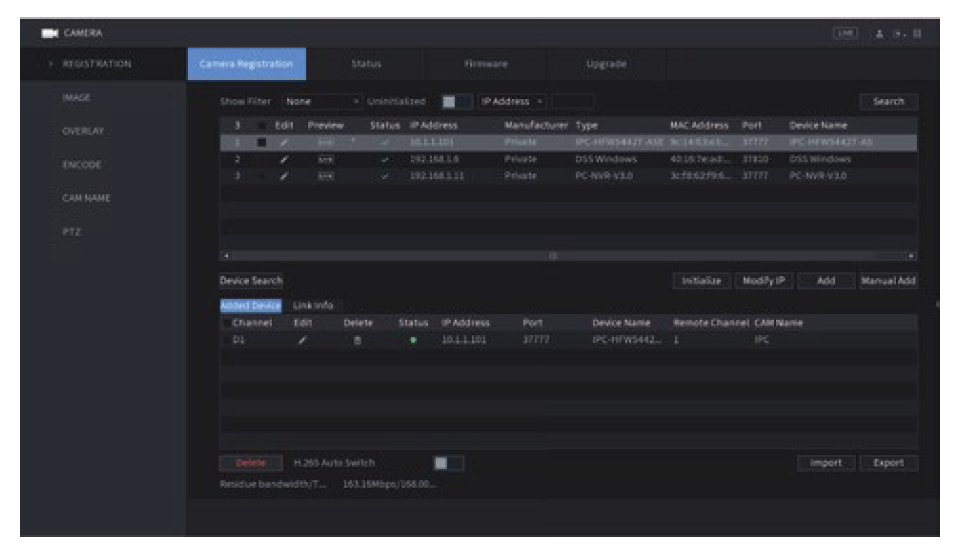
The camera status should now change to green, which indicates the camera has been added successfully
How to set up IP cameras to Dahua NVR CCTV system
Connecting IRLAB Cameras to Dahua IP NVRs
Step 1
Connect camera to POE Port of NVR or Switch
Step 2
Connect PC/Laptop to NVR or Switch POE port
Step 3
Run the IPC Tool Software on the PC/Laptop
Step 4
Change each cameras IP address to the same range as the NVR POE Switch or for non-POE NVRs the same range as the Ethernet port the cameras are connected to

Step 5
Enter the NVR menu and go to Remote/Camera > Remote
Step 6
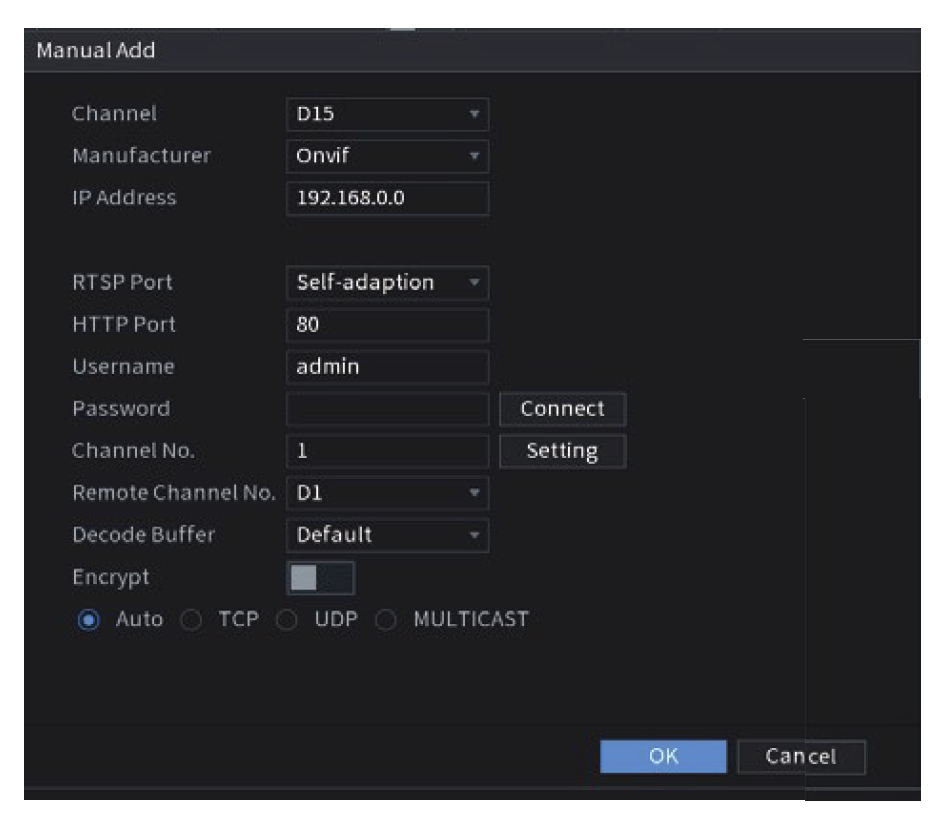
Select the option Manual Add and input the following details:
Manufacturer: ONVIF IP
Address: The IP Address of the camera
RTSP Port: 554 HTTP
Port: 80
Username: admin
Password: admin
Step 7
Click Save to apply the setting. Cameras can take up to 30 seconds to appear on the NVR live display.
How to set-up record schedule settings on Dahua CCTV
Menu > Camera > Encode
Camera record settings for NVRs are located in the encode menu. For IP systems the settings are stored on the camera and settings relate to the encoding quality of the video stream being transmitted by the camera.

Main Stream: This is the left hand column and is set to record by default. This is usually the HD Stream .
Extra Stream: This is a secondary stream which is not set to record by default. The extra stream is usually a much lower quality stream, it is often used for remote viewing when internet bandwidth is an issue .
Channel: Select the specific channel to view or modify.
Code Stream: Type The type of record, options are Regular, Motion Detection and Alarm.
Compression: The type of compression used for the recording such as H.264, H.264H and MJPEG.
Resolution: This is the total image size in pixels. The higher the resolution the clearer the image.
Frame Rate (FPS): How many images (frames) are recorded each second. 25 is real time recording.
Bit Rate Type: CBR - Constant Bit Rate keeps the bit rate (the size of the video)at a constant level regardless of how many changes are taking place in the image.
VBR - Variable Bit Rate adjusts depending on the amount of changes occurring in the image. High amounts of changes (movement, light changes etc) increase the bit rate. Low amounts of changes keep the bit rate at a lower level.
Bit Rate (Kb/s): This is the target bit rate given in Kbps. The bit rate determines the fi le size of the video stream. The bit rate should be adjusted based on Resolution and FPS. A high Resolution and FPS will require a higher bit rate, a lower Resolution and FPS will require a lower bit rate.
Audio / Video: The tick boxes along the bottom of the page represent enabling and disabling video or audio. The single tick box under mainstream enables or disables main stream audio. The two tick boxes on the right enable or disable video and audio for the extra stream (Left box is audio, Right box is video)
Click Copy to apply the same settings to specific, or all camera channels. Click OK to save the setting.
How to set-up record schedule settings on Dahua CCTV
Menu > Storage > Schedule
The Record Schedule controls when the unit stores video to the HDD’s, it also determines the recording type. I.e. Regular, Motion Detection, Alarm & IVS recording.
By default all Dahua NVRs are set to record 24/7 regular (continuous) record, motion and alarm recording are disabled.
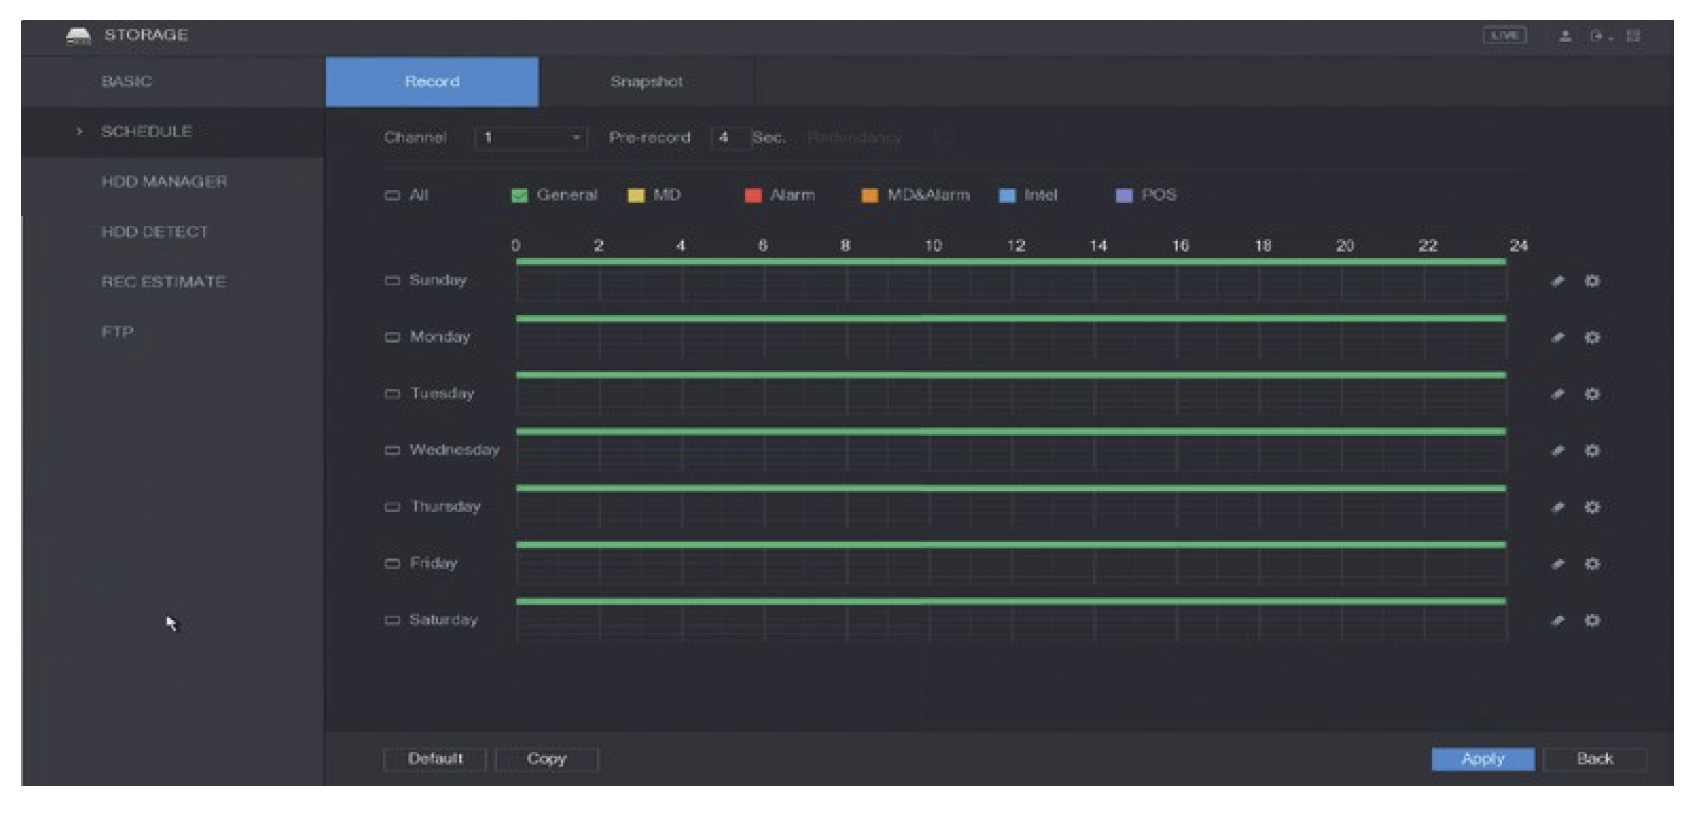
To edit the schedule click on the (settings ‘Cog’) symbol to display the schedule edit page. Once editing is complete, click OK to apply the settings.
The images below show an example of the record schedule set to record continuously between the hours of 08:30 and 18:00, with motion & IVS recording between the hours of 18:00 and 08:30 seven days a week.
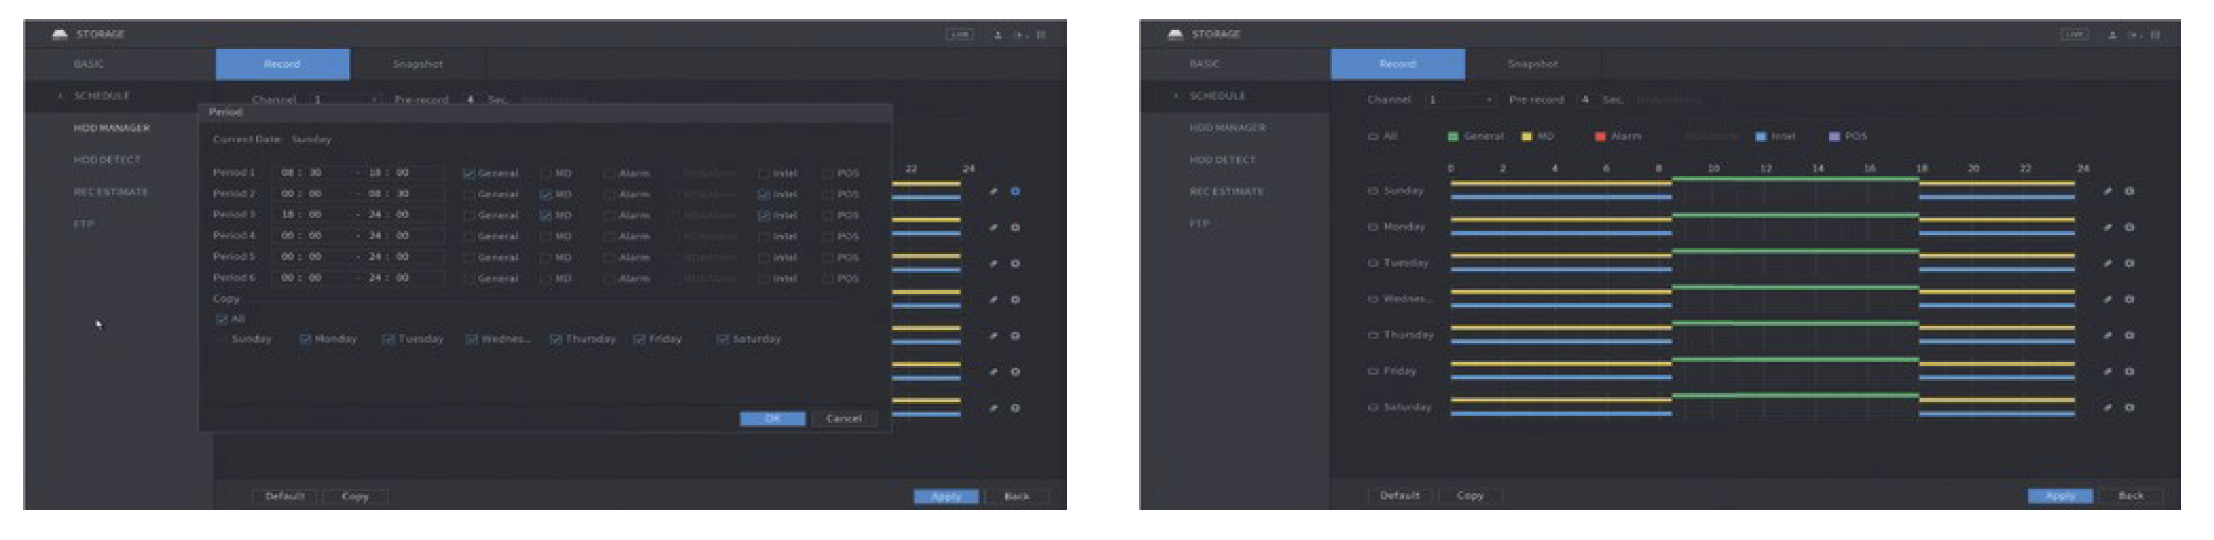
Click Copy to apply the schedule settings to specific, or all camera channels.
Click OK to save the setting.
How to set-up Tour settings on Dahua CCTV
Menu > Page 2 > Display > Tour
The tour function is used to sequence through different camera views at specific intervals. To configure a tour follow the steps below.
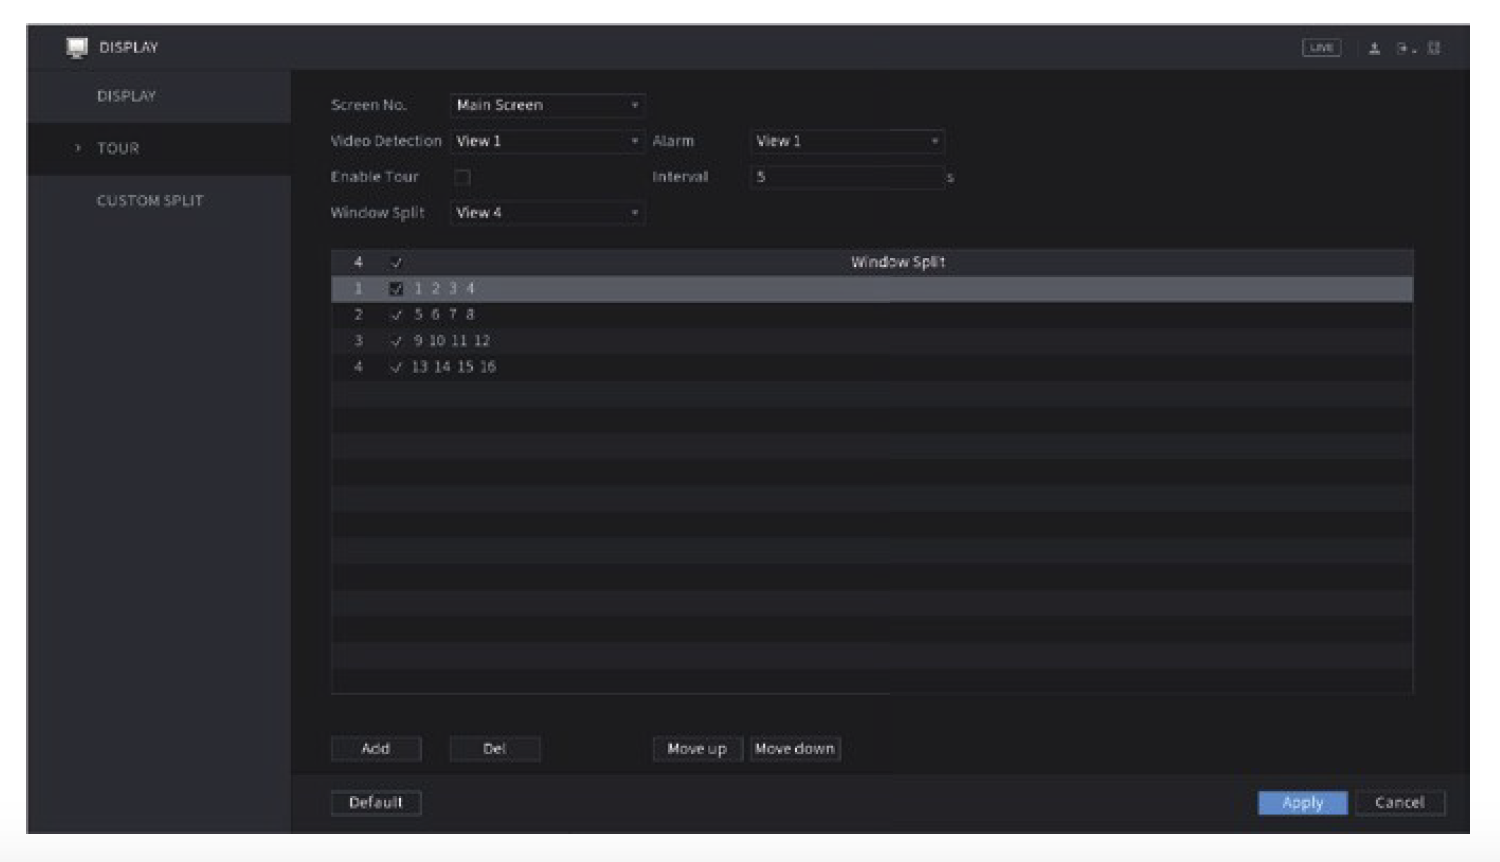
Go to Menu > System > Display > Tour
Video Detection This is the view type used when setting the system to change the camera view on motion events.
Alarm This is the view type used when setting the system to change the camera view on alarm events.
Enable Tour Enable or Disable the tour.
Interval Sets the interval between changing the camera view (when multiple views are selected) in seconds.
Window Split Select the type of view to edit or enable/disable a view.
When editing views in the system, select the view from the window split dropdown box. The ticked boxes represent whether the cameras are enabled or disabled in the tour. Enabling multiple cameras/views will automatically enable sequencing. To delete a camera/view select it and click the delete button. To add a camera/view click the add button, it is then possible to create a custom view by selecting specific cameras.
Fullscreen on Event
To set the system to show specific cameras fullscreen on event, go to Menu > Event and select the type of event. Enable the option for Tour and select the cameras to show when the event is triggered. To return the system to a multiscreen view after an event, enable a single view in Menu > System > Display > Tour.
0users like this.
 USD
USD
Your cart is currently empty.